Bending Wood using a Steam Box
My new project - building a little garden house (a snug) out of bent wood
Background
I want to build a new snug in my garden. A snug is a little cosy place with a wood burner where you sit warm and dry, protected from the elements, whilst whittling away, drinking a beer with a mate, or just enjoying the fire.
The old one got torn down when we built the extension, so a new one had to be built.
Build it out of concrete blocks or wood?
After deliberating what material to make it from - I did ponder to make a ball-shaped, telly-tubby style orange dome out of concrete blocks, I finally settled for a new wood working technique - using steam to bend wood. The design of the snug will be a stretched oblong shaped dome.
This page will focus on the making of bent wood using steam.
which components do you need?
1. The Steam Generator
2. The Steam Box
3. A Form - in the shape of the wood you want to bend
4. Good quality redwood for bending
5. The bending strap and flexible length adjuster.
where to buy in the UK
Where to buy the components in the UK
1. I procured most accessories from Toolstation - cheaper than Screwfix.
2. The form and initial whitewood for testing the bending process from Wickes [please note don't buy whitewood for the bending! - see section 4 below].
3. The steambox wood from a local timberyard - Abbey Fencing - very friendly and highly recommended.
4. The 15mm diameter dowel, hinges and clasp, and bits for the flexible length adjuster from a local independent hardware store - Welford Ironmongers - Highly recommended!
5. The redwood for bending from the Harlow Brothers - friendly service and competitive prices.
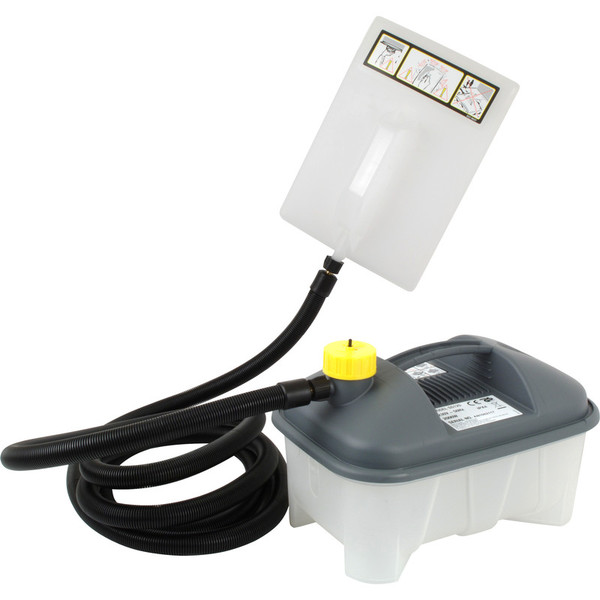
1. THE STEAM GENERATOR
Most people either use a gas fired kettle of some design, or an electric powered wall paper stripper. I opted for the electric method- an Earlex SS125. It has a 4Liter reservoir, it heats up to full boil in less than 15 minutes (after 8 minutes steam starts coming out) and lasts for more than the required 1hr, which is what people recommend per 2.5cm/1inch thickness of wood.
As an aside - upon searching for videos I found that Earlex has also realised this as a nice market and is actively marketing their steamers for wood working purposes.
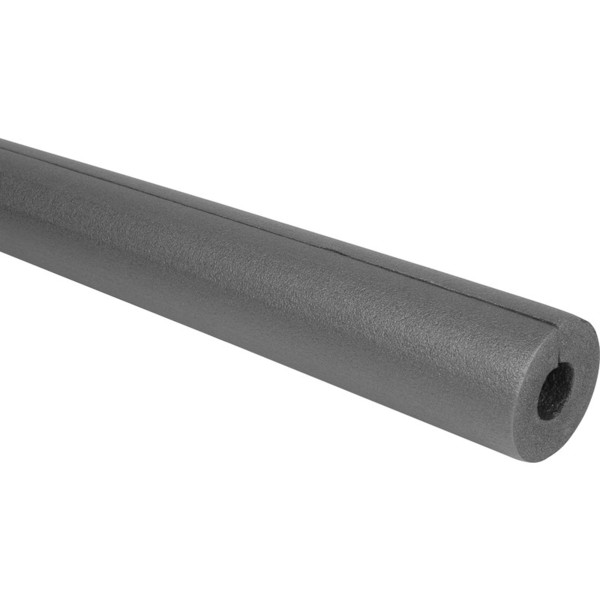
It comes with a 3.6m hose, which is fine when you are stripping a wall, but clearly this length has a single major drawback - it looses heat. Thus I insulated the pipe with 22mm ID pipe lagging. The hose length enabled me to position the box and electric extension cord in a rain proof area (underneath the garden table) and the box out of the way on the grass.
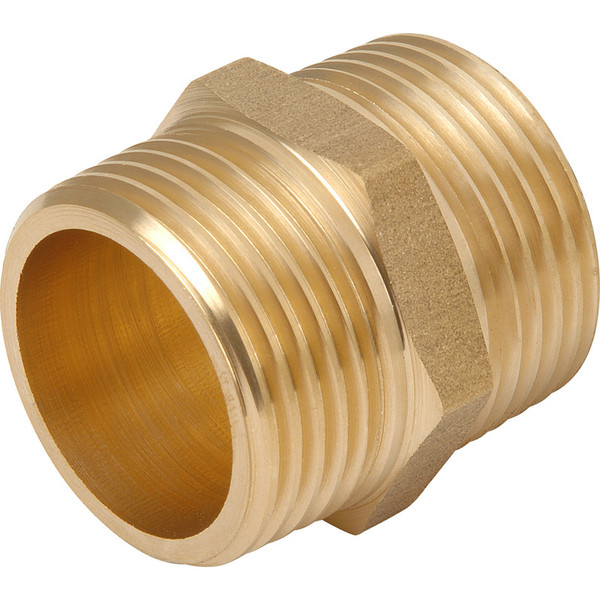
The connector to the steam box is a 1/4" BSP brass hexagon nipple. I drilled a 12mm hole in the box, and used a screwdriver which is positioned inside the nipple to ensure when you turn it in, it goes in perperdicular to the mounting surface.
On the other side, inside the steam box, I put another nipple (the wood is 24mm thick) and added a 1/4-1/2" hexagon bush and a 1/2" socket. There is no real science behind this, except that it is a slightly wider nozzle, and I had it spare from a previous experiment.
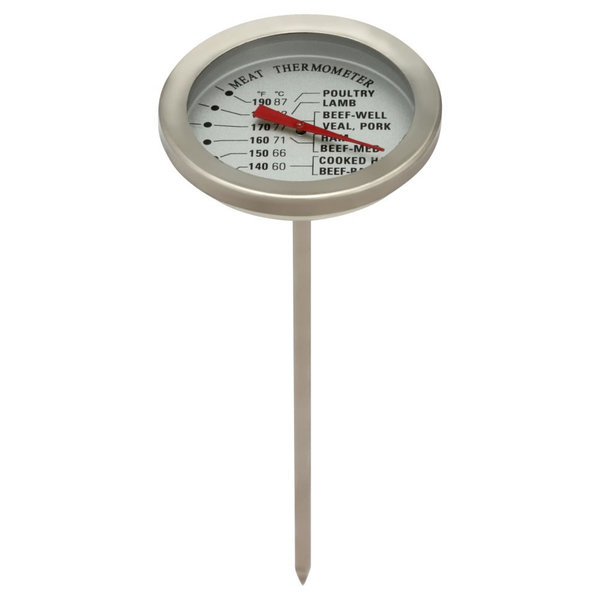
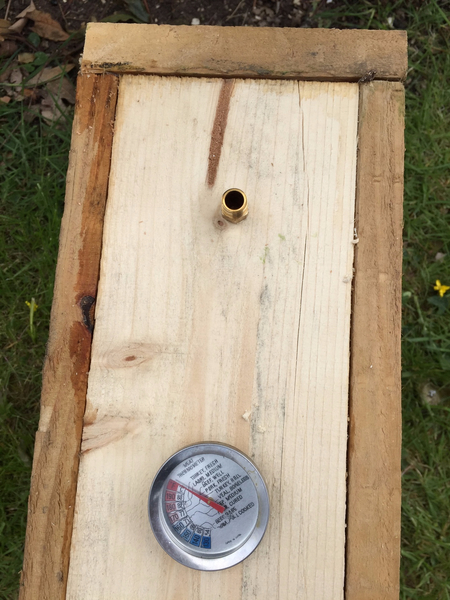
To measure the temperature inside the steam box I used a meat-thermometer inserted into the gas path through a small hole.
2. THE STEAM BOX
Which material to build the steam box out of: PVC pipe or wood?
Wood! I'll discuss the 2 designs, why PVC failed, and the wooden box triumphed.
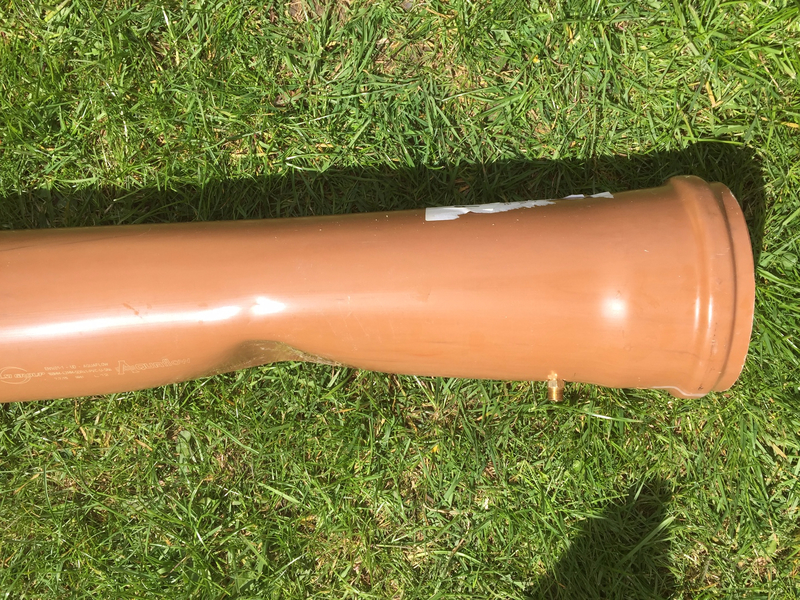
Design 1: My failed experiments with PVC pipe - Mark I
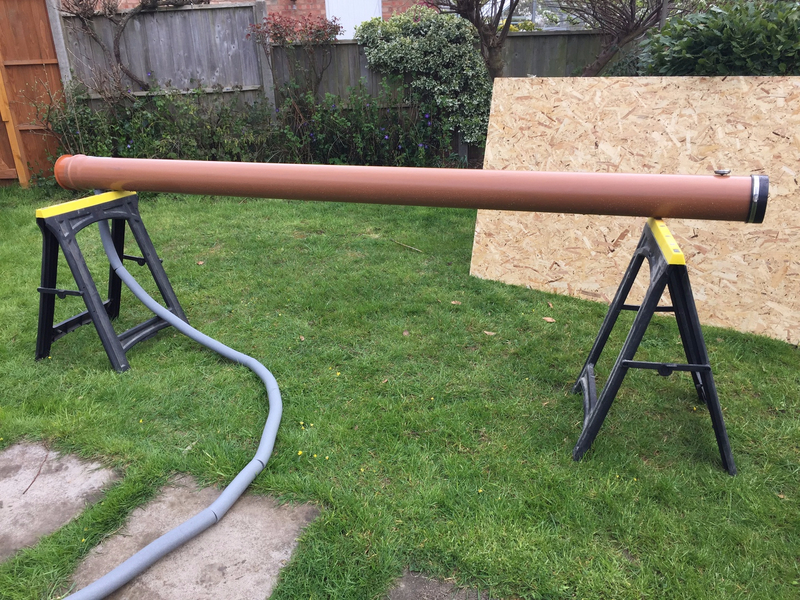
I looked at various websites and reports which people had written and decided initially to build one out of a heavy duty PVC soil pipe, 160mm diameter X 3m long. The main benefits would be: easy to put together (a pipe, an end cap and a flexible end cap), and leak proof - thus I had predicted less losses of steam. [note: even though I would not recommend this plastic design at all, I have added the links above, in case you were curious what I used]
However, upon testing, my design had a few major drawbacks:
1. Poor insulation. The very poor insulation value of the plastic meant that the heatloss was very large. I couldnt get the pipe above 85degC - I did consider insulating the pipe with glasswool - however that would mean I couldnt use it outside as the wool could get wet and soggy and not easy to handle.
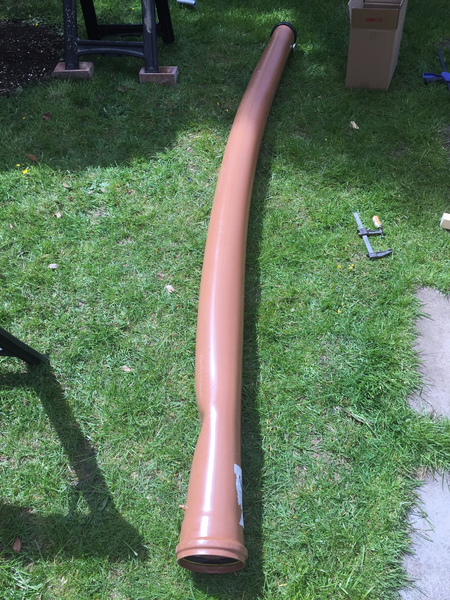
2. Sagging pipe: the PVC, despite being heavy duty, wasnt able to withstand the 1 hour of steam pooring into it, and the pipe collapsed on the rests and bent in the middle.
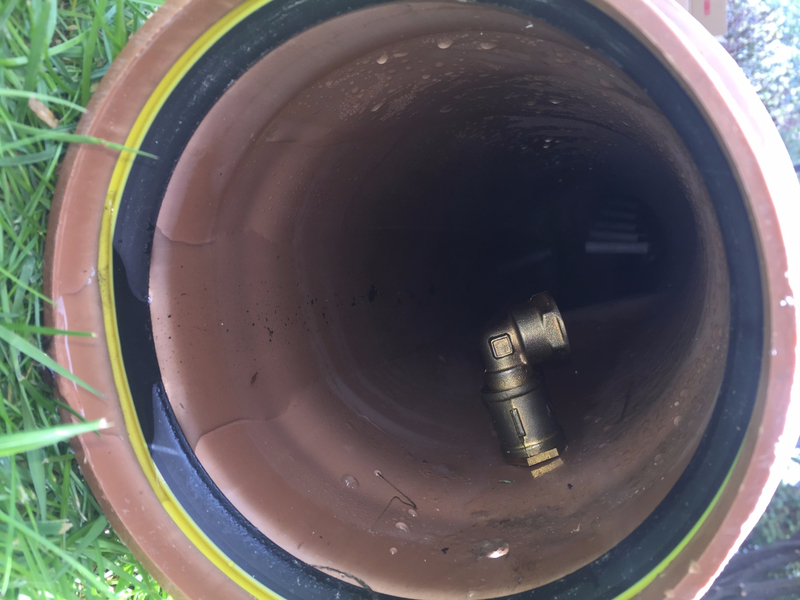
3. Steam inlet position. I positioned the 1/4" brass connector for the steam inlet at the bottom end of the pipe, which meant the steam was hitting first the top of the pipe, before dissipating. This resulted in excess condensate, and also the top part of the pipe was far hotter than the bottom, causing rapid deformation of the pipe.
4. its a pipe, not easy to mount. although people have made customised feet, it all feels like too much work and hassle, especially given the drawback above.
Thus I abandoned this design, and now have a nice 3m length of bent pipe on my scrapheap.
Design 2: Successful with a wooden box - Mark I
The initial reasons why I didn't go for a wooden box were two-fold: it would take time to build and it would not be steam leak proof. the former is a silly excuse for a wood worker, and the latter turned out to be not critical.
Advantages. It turned out the box had two major advantages over the PVC pipe, [which were the major flaws of the pipe design]: i) it could withstand continued use (many hours per day) without deformation, and ii) even though it has steam leakage through the seams, the natural insulation of the box is such that the temperature is close to 100degC, which is required for proper steambending of wood.
Design. A straighforward rectangular shape. I went to a local timberyard, Abbey Fencing, which makes wooden fences and bought 3m lengths of unplaned wide timber. The design was based on on this [xxx].
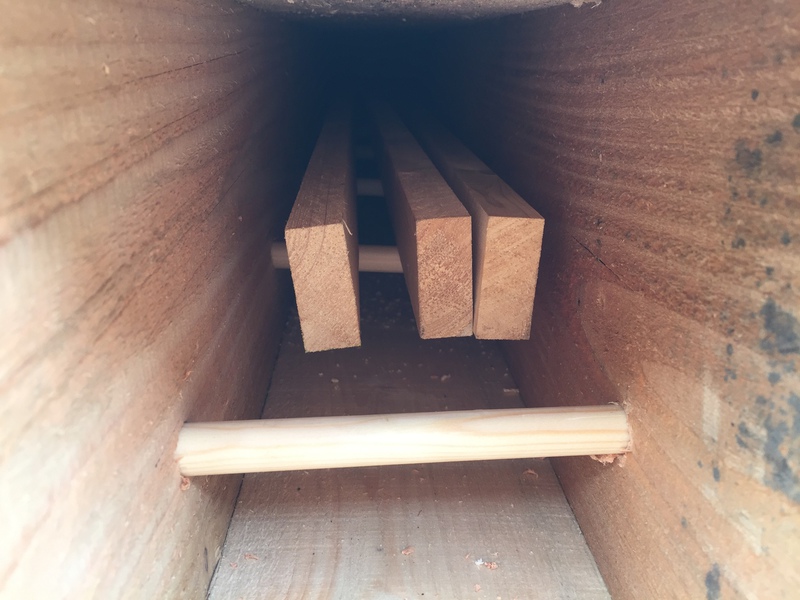
2off 1"x9"x3m for the sides
2off 1"x5"x3m for bottom and top
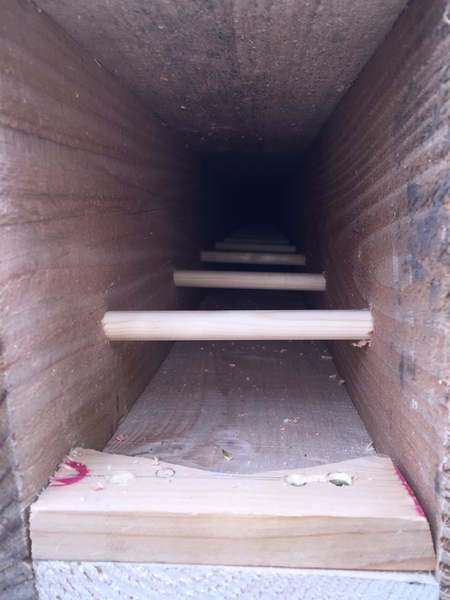
1 off 15mm diameterx2.4m dowel, cut in 14cm pieces; thus had 16, at 20cm intervals.
Hinged Door + End piece 2 1/4" thick wood. (It could have been 1" thick, but I had a spare piece lying around)
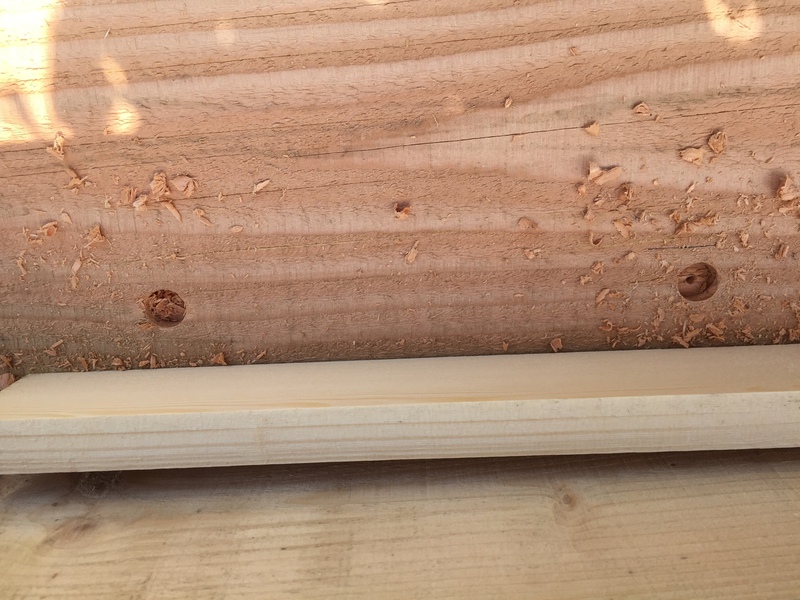
Inside the box I mounted 15mm diameter wooden dowels to ensure the steam was fully surrounding the wood.
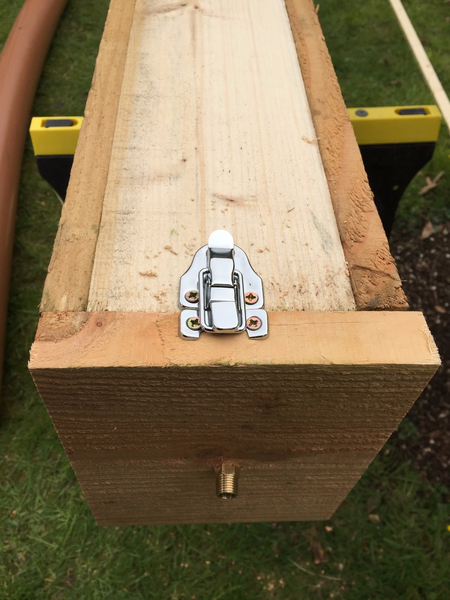
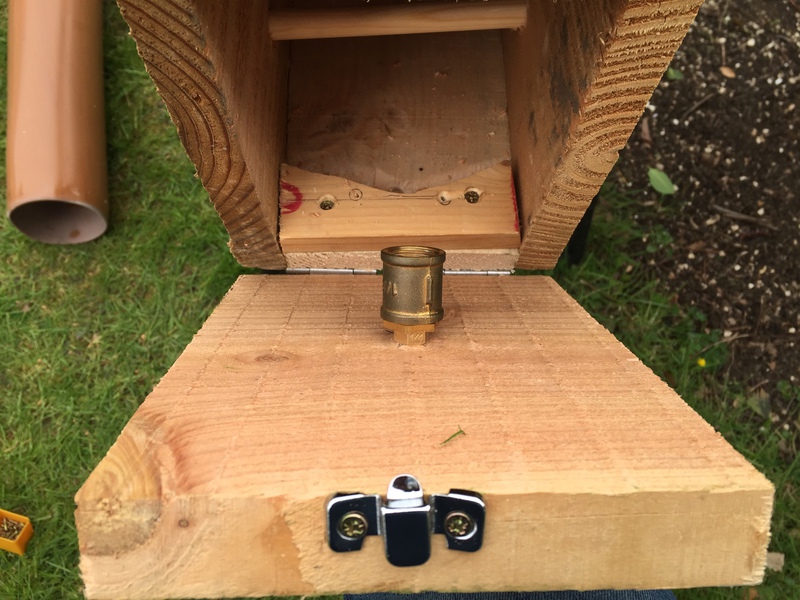
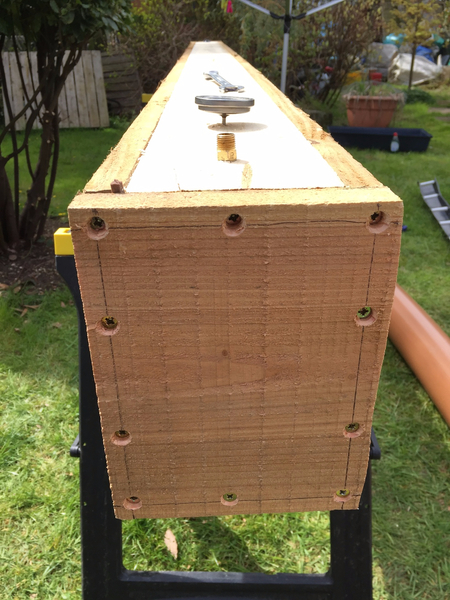
One end has a hinged door with a clamp, and also in the centre of the door the 1/4"BSP hexagon nipple for connecting the steam pipe.
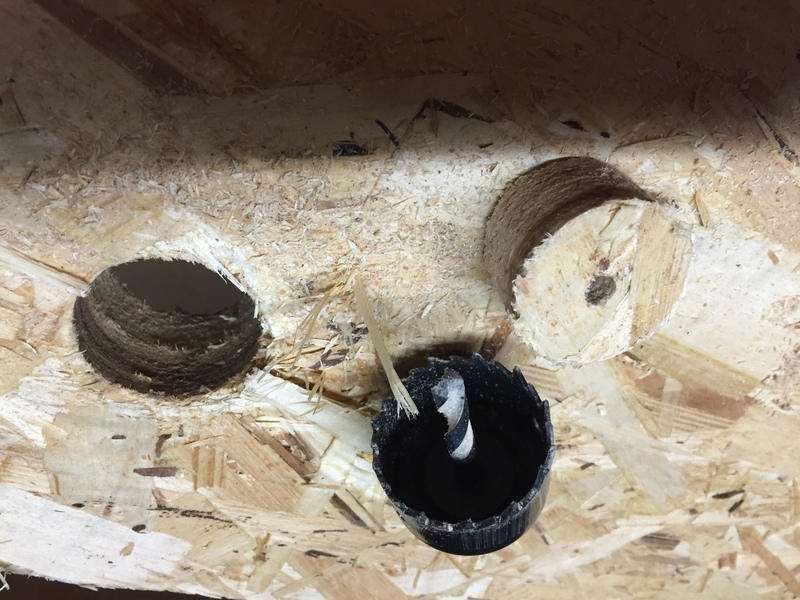
There is a small drainage hole at one end in the bottom for condensated water to leave the box, one hole at the opposite top end as an outlet for steam, and finally small hole at the top end of the box to fit the meat thermometer (which goes up to about 95degC).
I also screwed on two unequal height feet to ensure the box is always at a small angle when positioned on a flat surface to aid the condensate flowing out of the drain hole - A long spirit level is used for verification of this.
I mounted the 1/4" brass connector in the centre of the hinged door to ensure the steam was travelling in a straight path onto the wood [in the PVC pipe I had it mounted at the bottom, which meant the steam travelled disproportionally along the top of the pipe, and also condensated straight away].

THE FORM
The wood
The form of the snug will be a domed roof. I designed the shape of the timbers such that I could get a curved shape with sufficient head height and cosey enough to sit in out of standard 2.4mm length wood. I used a piece of 2.4m string and cellotape to position the string on a flat piece of wood until I had a shape that looked appealing to the eye.
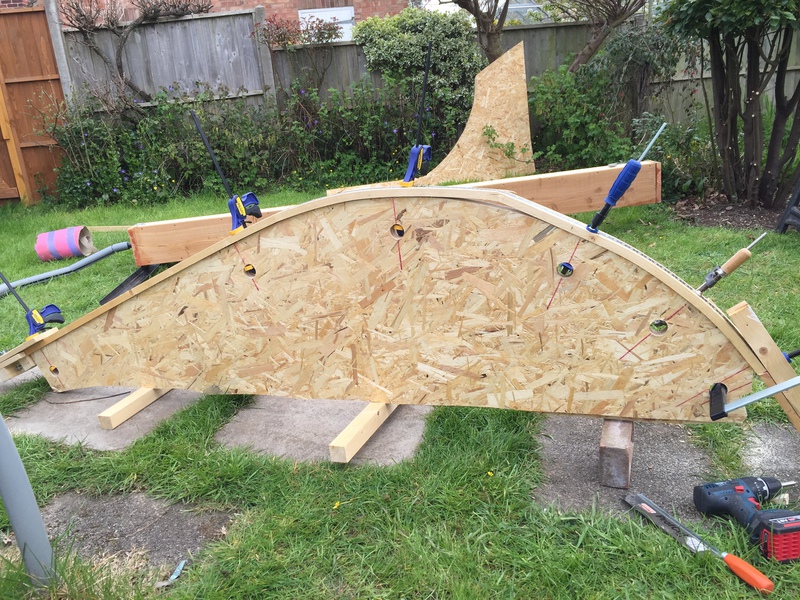
The Form is made of 2X18mm thick General Purpose OSB3 , which I procured as a single piece from Wickes.
Reason why OSB and not MDF; as the form has to stand outside in the British inclement weather...
The technical design for the form came from a youtube video [xxx]. At regular intervals I drilled 35mm holes to fit the end of adjustable clamps.
Clamps
I use 2 different types of clamps. 300mm Light duty Irwin adjustable clamps on the low tension parts of the curve, and 300mmx120mm Draper F-clamps at the high tension end (the very end of the top of the curve).
Positioning edges
along one edge of the form are 4 raised edges, made from some scrap pieces of 22mm thick wood, to ensure the wood is positioned straight onto the form. note that the width of the wood is 44mm, the form is (2X18mm) 36mm, so there is a slight overhang.
Feet
To keep the form upright I put two cross pieces of wood as feet (some scrap as well). However, as it is positioned on the ground, I have had to raise it with a few brick to have sufficient clearance of the ground when bending the wood with the bending strap.

4. the wood
Make sure it is knot-free redwood!
1. Low quality "white wood" for testing
For the initial experiments I used straightforward whitewood from Wickes; 22x44x2.4m. As it turns out this wood has some major disadvantage which most experts warn against: it is not free of knots, and due to higher growth rates is quite brittle. As it turned out, each of the initial 6 test pieces had at least one stress-fractures along its length where there was a knot, thus the stress levels in the curve are too high to ensure a smooth curve with this wood.
However, my reasons for buying this "rubbish" wood were two-fold:
1. The woodyard I wanted to buy better quality from was shut over the weekend I was doing the initial testing (...)
2. I first wanted to learn using a low cost proof-of-concept, just in case I didn't get the initial steam and other parameters right. Thus this enabled me to try out the entire process at a low cost. Also a little bit of curiousity: if I can bend successfully low quality wood, I will be definitely successful with more expensive high quality wood.
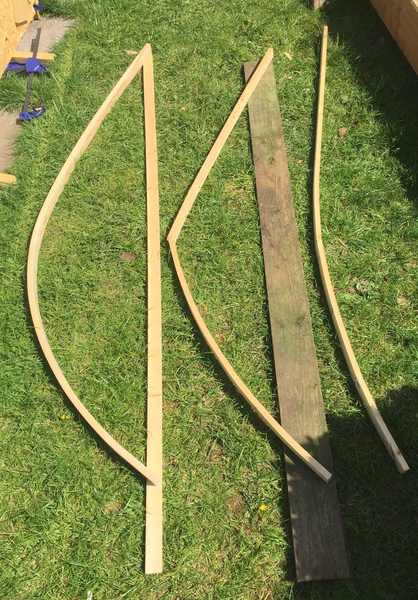
2. High quality "redwood" for production
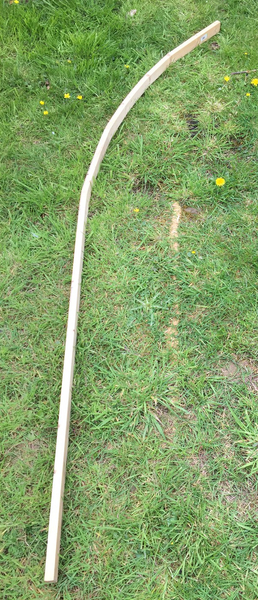
Once I had tested out all the aspects of the whole process, I procure higher quality wood from the Harlow Brothers. knot free red wood instead of knotty white wood.
The result is amazing compared with the whitewood; it bends easily, and no breakage. So always find a good local woodyard and rummage through to find knotfree lengths of redwood.
I went for 25mmX40mmx2.4m, which is steamed for about 60 minutes. Interestingly, this higher grade redwood cost the same per length as the lower grade whitewood from Wickes...
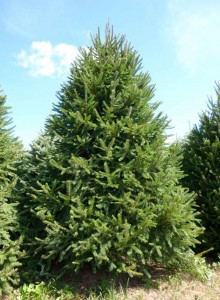
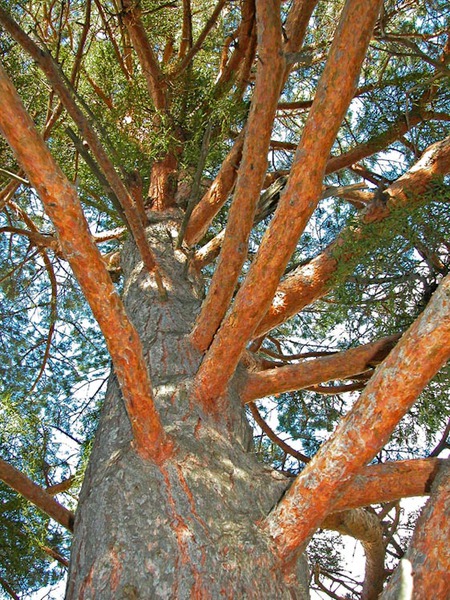
What is the difference between whitewood and redwood?
Simply: redwood is pine, whitewood is spruce. The redwood I am using is virtually knotfree, and has a much denser grow lines on it, it seems to indicate a slower growing wood in a colder climate, rather than fast growing wood in a milder climate.
Redwood appears to refer to Pinus Sylvestrus, or Scots Pine, but most of it comes from the Baltic or Scandinavia - hence the other name: Scandinavian Redwood.
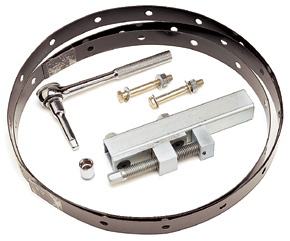
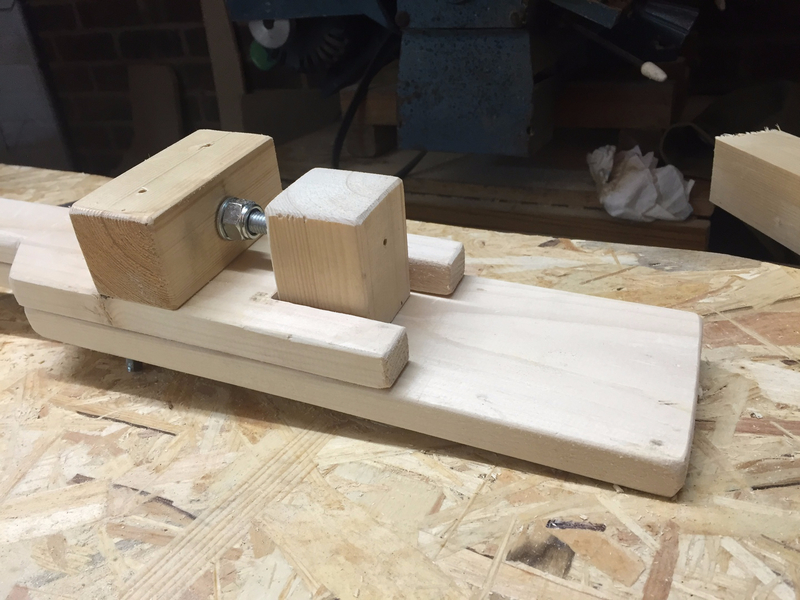
The Bending strap and adjustable clamp
On a few other websites I noticed that they use a flexible metal strap attached to two wooden handles to help bending the wood with ease. I combined the various designs into one, including a home made adjustable clamp, of which I am particularly proud!
The design consists of three elements: the bending strap, a fixed handle and an adjustable clamp.
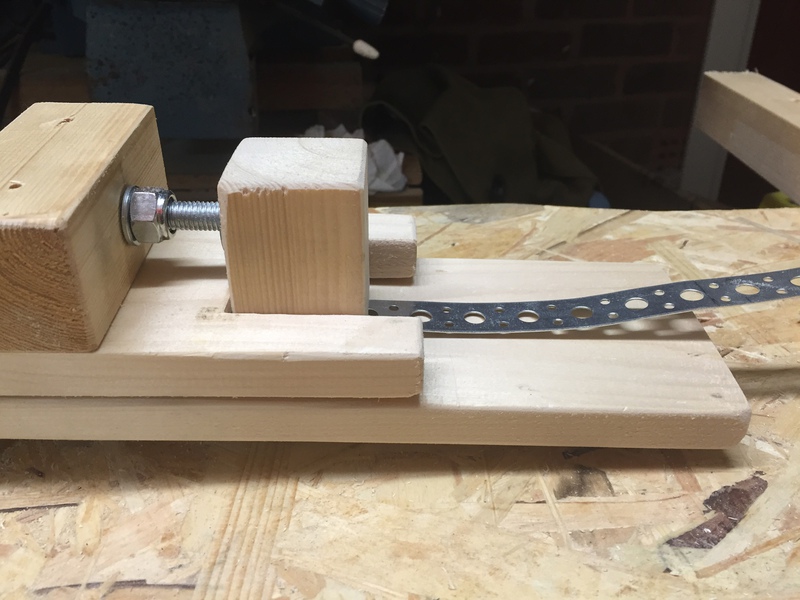
1. The bending strap
The strap itself is made of 2x20mm wide galvanised banding used for fixing in general construction. at 20cm intervals I screwed it onto a small square woodblock too keep them the same length.
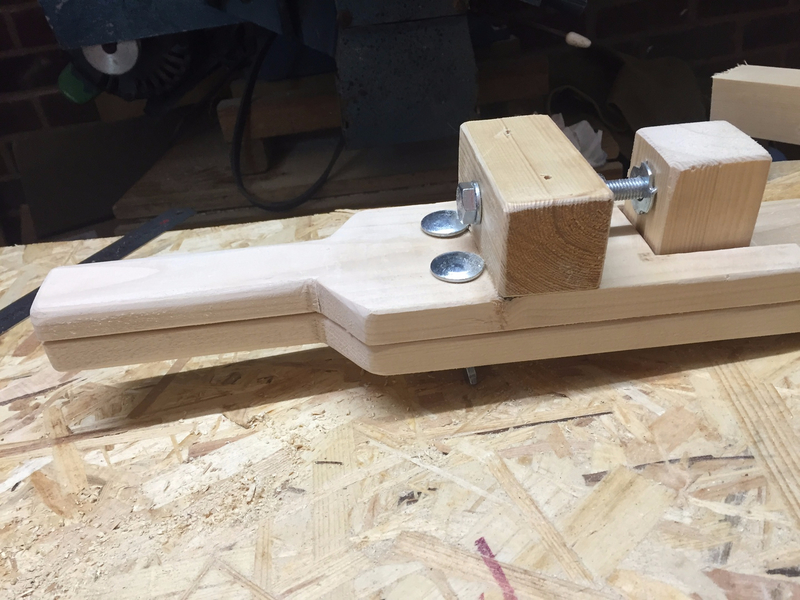
2. Fixed handle
The fixed handle is made from two pieces of wood. A small piece which acts as a clamp and a longer square piece of which I rounded the edges so it is comfortable holding it in your hands. Note that the large piece extends over the wood which we will bend to enable the application of downforce onto the wood.
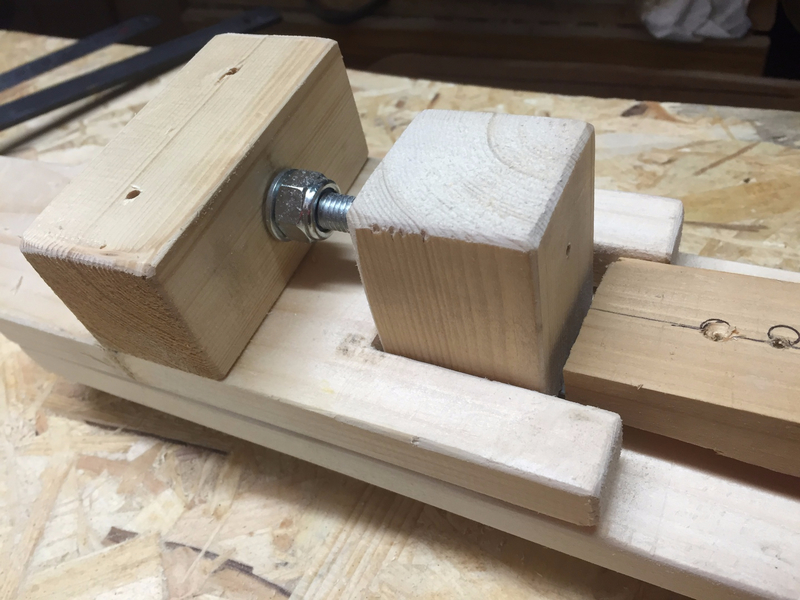
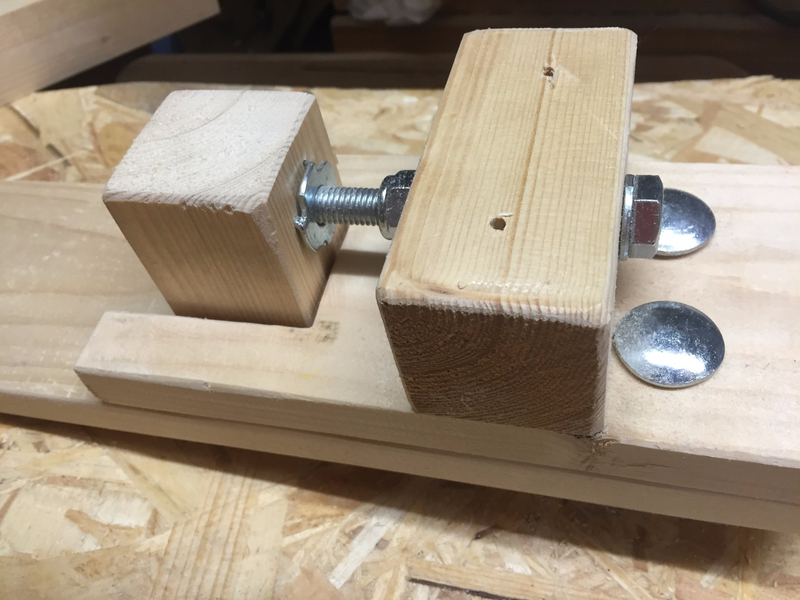
3. Adjustable clamp
I saw on one Canadian website that they used a commercially made aluminium adjustable clamp. I basically replicated the basic concept out of wood. It serves 3 purposes:
1. To apply downforce on one end of the wood.
2. To be able to adjust easily the length of the strap to the same length of the wood to be bent
3. To do a fine adjustment once you have positioned the piece of wood inside the clamp and add tension to the strap.
The handle is made out of two halves, which are connected together using 2 coach head M10 bolts with butterfly nuts, which provide rapid strap length adjustment and clamping down the galvanised strap. Note: if a strap is longer than the handle, bend it out of the way and protect the end, as this has quite sharp edges.
The fine adjustment mechanism is made with a large 120mmXM10 bolt, 2 washers, a nylon lock nut, and a pronged Tee nut. Note: the pronged tee nut is the weakest part of this design, as it is not very securely locked in place inside the moving piece of softwood; I have considered a redesign with a nut inserted into this moving piece (like ikea furniture) which I will do once this has given up.